Installation, En - 7 – Philco PEW 6712 Uživatelská příručka
Stránka 9
EN - 7
04/2012
Copyright © 2012, Fast ČR, a. s.
Installation
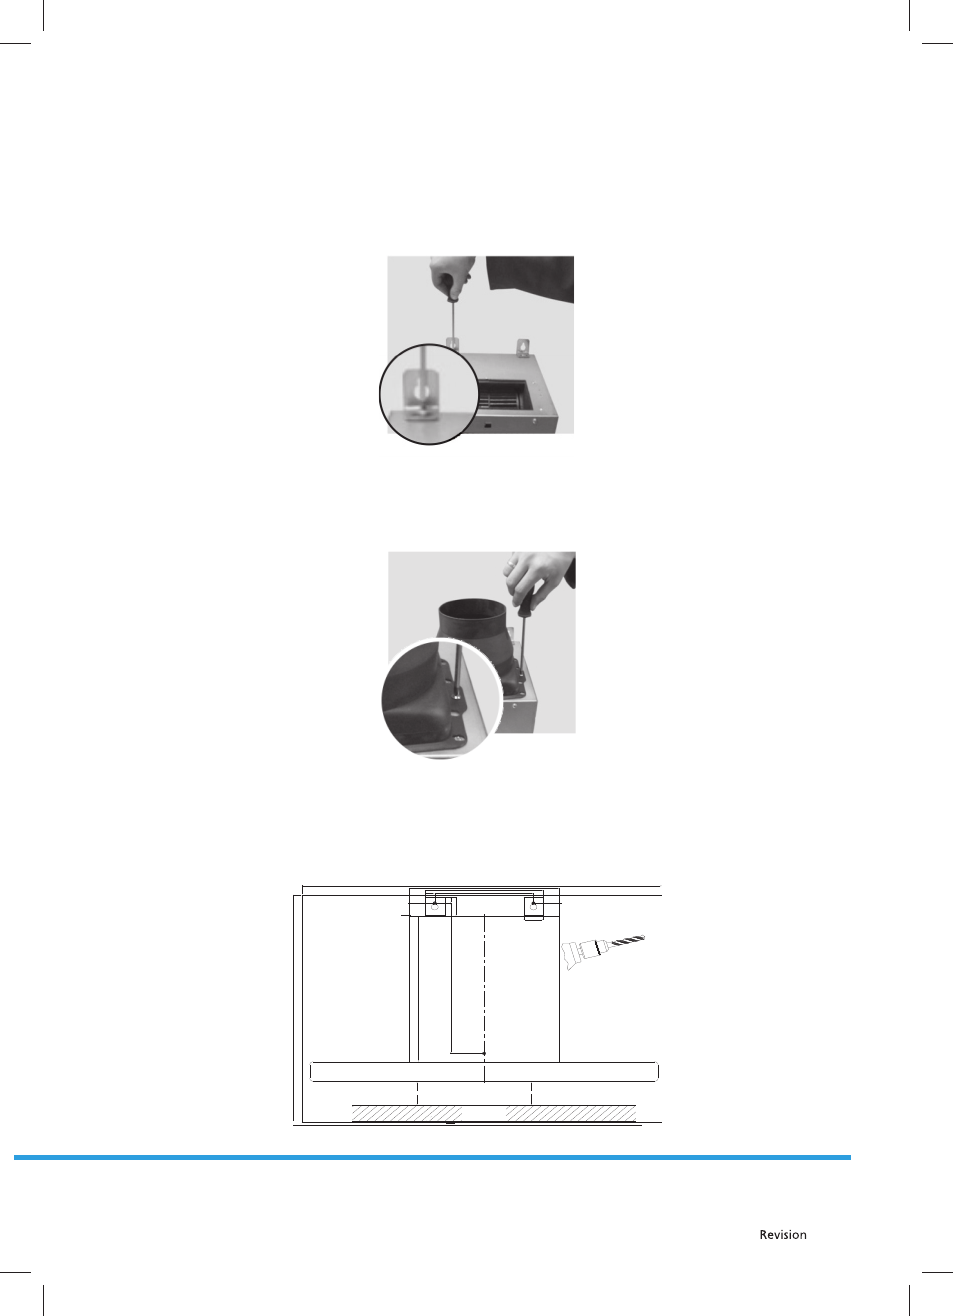
1) Installation of hanging brackets
To hang the range hood it is necessary to fi rst install 2 L-shaped hanging brackets, which are supplied
together with the screws, on to the range hood according to the illustration below. Then secure the
brackets using appropriate M5 x 40 screws into an M5 thread.
2) Installation of the non-return exhaust fl ap
Install the non-return exhaust fl ap on to the top part of the range hood using 3.5 x 9.5 screws according to
the illustration below.
3) Drilling mounting holes
Place the installation template against the wall and drill holes in points A, B, and C using a drill bit with
a diameter of 8 mm. To install the chimney, drill holes using a drill bit with a diameter of 6 mm adhering to
the dimensions for the minimum and maximum height.
C
B
A
170±1
17
12
38
34
30
7±
1
29
8
204
259
A,B,C = Ø8
H670.3174.01
620
465
min.650-max.750mm
min.750-max.800mm
ELECTRO GAS