Care and cleaning, Steam cleaning, Shelf supports – Philco POB 62 Uživatelská příručka
Stránka 78: Removing the shelf supports, Installing the shelf supports

Food
Food Core Temperature °C
Whole hare
70 - 75
Saddle of venison
70 - 75
Leg of venison
70 - 75
Fish
Food
Food Core Temperature °C
Salmon
65 - 70
Trouts
65 - 70
Information on acrylamides
Important! According to the newest
scientific knowledge, if you brown food
(specially the one which contains starch),
acrylamides can pose a health risk. Thus,
we recommend that you cook at the lowest
temperatures and do not brown food too
much.
CARE AND CLEANING
Warning! Refer to the Safety chapters.
Notes on cleaning:
• Clean the front of the appliance with a
soft cloth with warm water and a cleaning
agent.
• To clean metal surfaces, use a usual
cleaning agent.
• Clean the appliance interior after each
use. Then you can remove dirt more
easily and it does not burn on.
• Clean stubborn dirt with a special oven
cleaner.
• Clean all accessories after each use and
let them dry. Use a soft cloth with warm
water and a cleaning agent.
• If you have nonstick accessories, do not
clean them using aggressive agents,
sharp-edged objects or a dishwasher. It
can cause damage to the nonstick coat-
ing.
Steam cleaning
1. Remove the worst of the dirt manually.
2. Put approximately 250 ml of water and
3 tablespoons of vinegar directly into
the steam generator.
3. Touch again and again until the dis-
play shows
.
4. The display shows the duration (15 mi-
nutes) and the default temperature.
Touch
to start the cleaning.
5. An acoustic signal sounds when the
steam cleaning is completed. Touch a
sensor field to stop the signal.
6. Clean the appliance with soft cloth. Re-
move the water from the steam genera-
tor with the sponge and rub it dry.
Keep the door open for approxi-
mately 1 hour to let the appliance
dry fully.
You can use the End function to delay
the start of the cleaning. Refer to "Set-
ting the END".
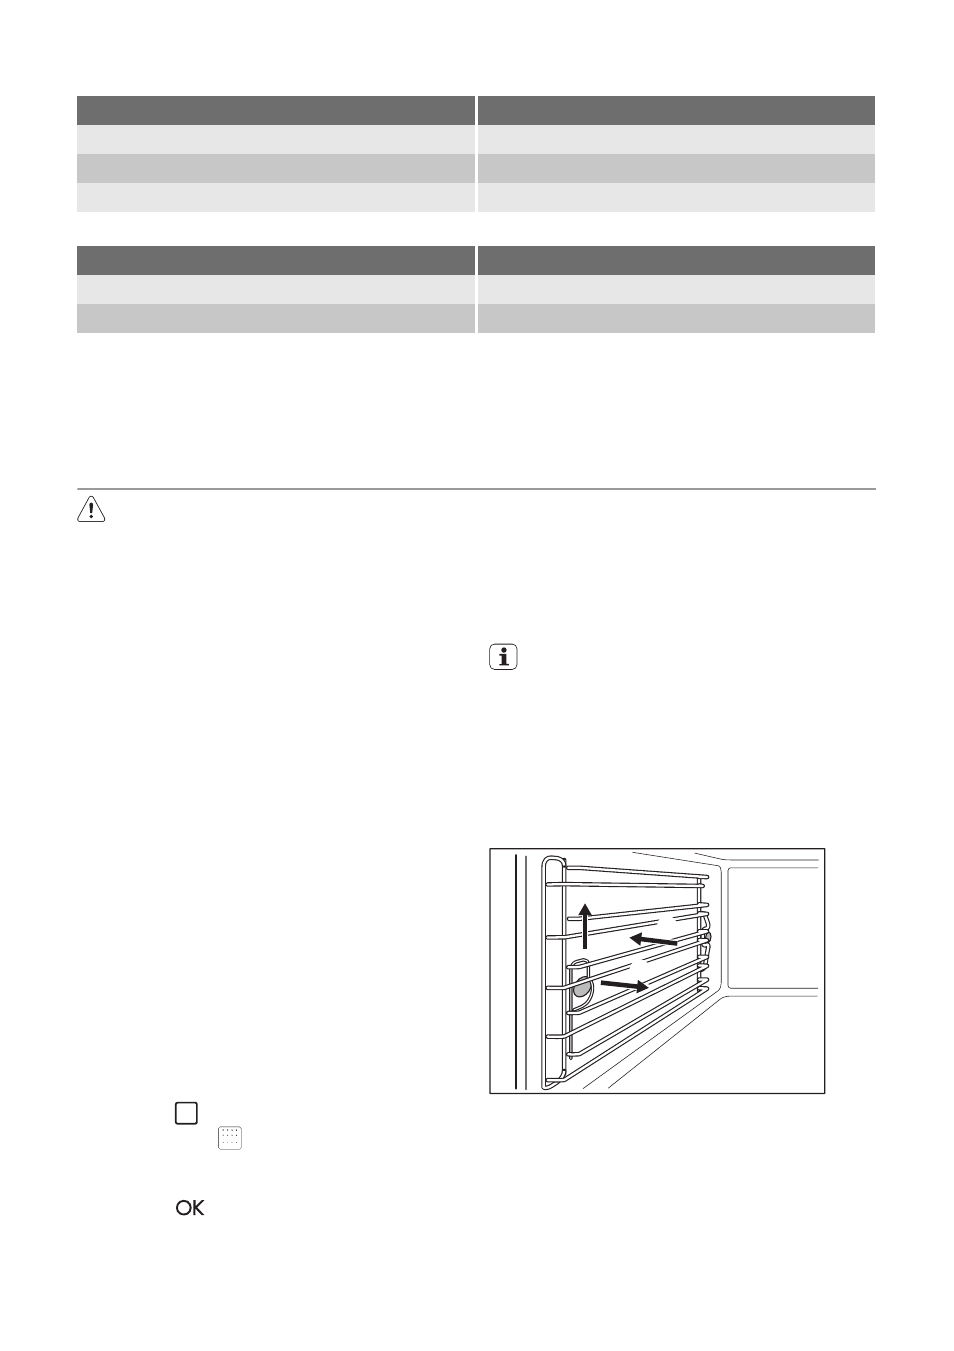
Shelf supports
You can remove the shelf supports to clean
the side walls.
Removing the shelf supports
2
3
1
1. Carefully pull the supports up and out
of the front catch.
2. Lightly move the supports on the front
catch inwards.
3. Pull the supports out of the rear catch.
Installing the shelf supports
Install the shelf supports in the opposite se-
quence.
34